Pages

Monday, March 31, 2014

Baby Dress from a T-shirt


This is possibly my new favorite dress for my baby girl. It is just so cuddly!


I started by cutting off the sleeves and then along the shoulder seam and side seams. 


I loosely measured how much a baby onsie overlaps. 


I also loosely measured how long across it was. I semi used this measurement but adjusted as I went on. 


I pinned approximately how long I needed. 


Using the onsie as reference I drew out a basic dress pattern. ( which I later altered)


I folded it in half to cut. 


I used the front piece as a template for cutting the back. 


I overlapped the neck pieces by about 2.5 inches and pinned them and trimmed them since they angled a bit. 


I used the sleeve from the t-shirt for the sleeve and measured width from the onsie. 


I drew with washable marker and make sure the opening would fit a baby hand. Of course I made it about a half inch larger than I thought I needed for the seam allowance. 


I cut both sleeves. And trimmed the edges. 


I put right sides together starting from the middle and pinned. Then sewed them together using a zig-zag stitch. 


After sewing both sleeves I turned it inside out matching front to back and adjusted it as needed. 


Of course my original pattern needed some tweaking.


I rounded off the skirt. Sewed down the sides with the zig-zag stitch again, and then hemmed the bottom edge turning it under once since it's a knit fabric and doesn't really fray. 


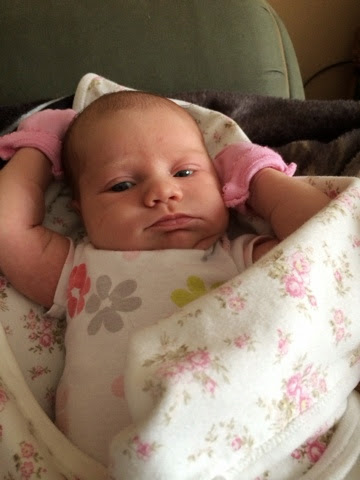
I of course then tested it on the baby. She loves it. Or at least I do. 

Wednesday, March 26, 2014

DIY headband for you or baby


What you will need:

Old pair of colorful tights
Needle 
Semi-matching thread to tights
Ribbon or lace to accent

Get ready for more detail than you need. Hopefully a real beginner can catch on.


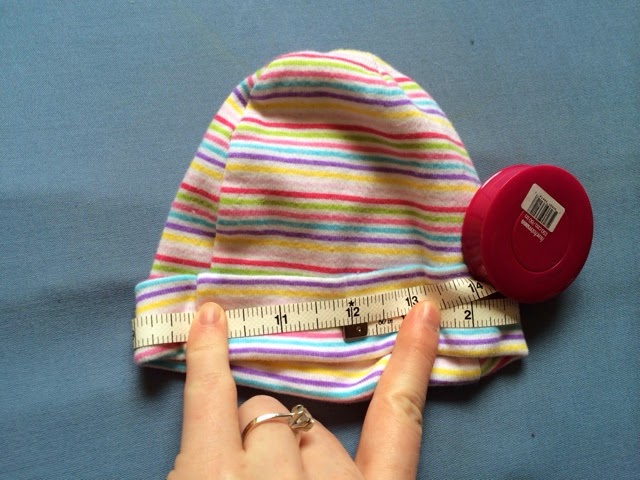
Measure either a hat or your head. (If you use your own head cut the tights 2-3 inches shorter than the measurement since the material is very stretchy)


Cut a length of one of the legs plus an inch for overlap later. 


Please double your thread. You need a little thread strength with this. 


Tuck the smaller end inside the larger (if it's not straight).


This isn't totally necessary, but I like to hide the original knot inbetween the layers. 


I also like to circle back through the loop so the original knot doesn't get pulled through the knit material. 


Dolphin stitch up and down with large stitches  through all 4 layers of material. 


Pull the thread tight scrunching the material together then thread the needle back  through the scrunch. 


Like so. Loop it back the other way a couple times. 


I like to wrap it tight around with the thread a couple times. 


On the back side (whichever side looks worse) hold thread tight, pick up some material with the needle and do a loop knot a couple times in the same place.  (Before you pull the stitch all the way through you put the needle back through the loop then pull tight creating a knot)


Pick some ribbon or lace and cut a small piece that can over lap a little on the back. 


I didn't even cut my thread I just went up through the two parts of the lace. Then I did some dolphin stitches around making sure to pick up some tights material with the lace. Then I tied it off to the side somewhat under the lace. 


Finito.


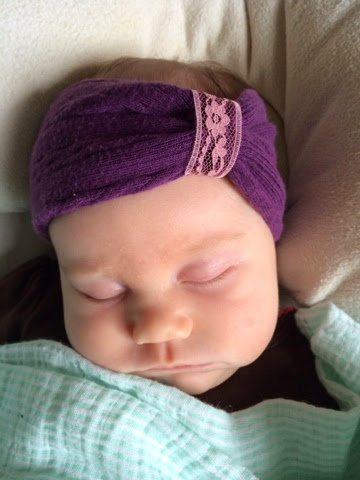
Comfy enough to sleep in.

Tuesday, March 25, 2014

My First Baby Dress


Now before you get all excited about my sweet skills, this is the story of taking what's already cute and cutting it down to baby size, not working from scratch.


First I started with a perfectly good dress. 


Next I take a perfectly good baby dress and measure and then measure on the big dress starting at the perfectly good waistline.


Next, repeat for the length of skirt also starting at the waistline and mark. 


And finally take measurements for the waist and add a couple inches for leighway. (I'd add three or four if I made it again for the waist measurement)


When you cut make sure to cut an inch or two larger than you need to turn under seams and to allow for a less stretchy fabric/mistakes.


After cutting it down I measured again for about where I'd need the arm holes to start going down.


Then I made a cut for the arms (again leaving room to turn under).


I used a seam ripper and pulled out the little loops so I didn't have to make my own.

I also salvaged the straps.


I forgot about the pockets and sewed a straight line down them then trimmed the pocket off.


Then I hemmed the bottom of the dress after ironing.


This was a kinda nice dress so I was able to iron under the edges then tuck the straps and loops in for one sweep through sewing across the top.


I pinned them in and sewed close to the edge.


Here is the part I messed up a bit. I sewed the back seam, but had forgotten to make sure the sides were the same. Also I wish I'd made the elastic longer than I did. 


I'm new at the elastic thing. I used 4 inches and stretched it to six when I sewed it on. I should have used more and left excess fabric on the waist so the dress could last a little longer for a growing baby. The way I did it left little extra room and the end result was a little smaller than I'd hoped, but it does fit baby girl now so that's fun.

Poor thing had a clogged tear duct but she is still so sweet.

Annnd the finished back.

Friday, March 14, 2014

Charlotte Grace


"For you created my inmost being;
you knit me together in my mother’s womb.
I praise you because I am fearfully and wonderfully made;
your works are wonderful,
I know that full well."

Psalm 139:13-14


Charlotte Grace Howard arrived at 5:30pm February 7, 2014
She weighed 7 pounds 7.5 oz and was 21 inches long and perfect .... Well except that poor cone head she received from being in the birth canal a little longer than is normal. Poor thing. 

After pushing out my own bundle of joy, I now understand why my mother always discussed her birth stories with whatever mother she met. 
I have many memories of my mom talking about her various trials.


And now, I am proud that I birthed this little human. The Lord gave me strength and there was so much joy involved (In the end). It is something mothers have in common, a bond through a 'common' experience. I now get to join the mom club where you talk about epidurals, episiotomies, water breaking and contractions. So although we may have chosen different birthing plans we all birthed babies and that is pretty neat, and perhaps the only thing we have in common.

To many who aren't as familiar with births, these talks can seem weird, or make you uncomfortable (I remember). So if you fall in that category I am sorry if mothers (or I) make you uncomfortable, but you have to understand that birthing is one of the hardest and most rewarding experiences of a person's life, so your discomfort will easily be outweighed by a new mom's excitement.


Yes, dear friends, I am very much in love with this little nugget.  Raising her is now the most important mission in Stephen and my life; so forgive us for our changing interests and possibly becoming boring friends or talking about things that make you uncomfortable. We may not travel as much or go out as much, and we will certainly inform you of all the small accomplishments of our little one because, to us, that is exciting and important.

It's strange to have transitioned into parenthood, but I hope you understand and can allow our friendships to transition too. 


Friday, January 24, 2014

Motherhood

I have a pretty fantastic mother. This is her August 5, 1987 when my due date was July 25th; Sorry mom! 


This is my Mom and me in July 2011 in Manila.

 And this is me and my girl just a few weeks ago in Norfolk. 

As I sit here with my child putting pressure on my bladder, I think I've been really fortunate. I just watched an episode of Parks and Recreation where a character is complaining about all of her pregnancy trouble and I just think how blessed I must be. Now, I do not mean to brag, but I want to be thankful when I should be. Being pregnant, aside from the stretch marks and my body doing strange things, really has been a pretty joyful time.

I've had a job that although tiring, I have been enjoying. I have a husband who loves me and tells me I'm the "most beautiful pregnant woman ever." I can sleep through most of the night still (38 weeks now) with limited bathroom breaks at 2 hour intervals. And we have AMAZING friends and family.

Our co-workers, friends from youth, college, Virginia Beach, family and even friends from overseas have continued to shower us with blessings and love. Have I ever mentioned that gifts and service are big in my love languages? I have felt so loved in this time and am so thankful for everything. 

We have been given almost everything we could have asked for. God truly knows how to provide through generous hearts.

As I enter the final stretch of this pregnancy, I know the hardest parts are ahead and I know I will be supported and provided for physically, emotionally, and spiritually.  I have plenty of fears and the Lord is slowly destroying them and replacing them with peace and trust and faith. I think that's why He had me choose the word "Fearless" to represent this year. Becoming a parent has got to be one of the scariest things ever, but with Christ by my side and the support of my hunky husband, friends and family, I know that fear will not win.

"He will feed His flock like a shepherd;
He will gather the lambs with His arm,
And carry them in His bosom,
And gently lead those who are with young."

Isaiah 40:11

Tuesday, January 15, 2013

Inspired by a Grumpy Cat

So the Grumpy Cat meme is one of my personal favorites so I thought I would do some fan art and then thought, um....I can give it accessories!
My first thought was for a sailor. I felt many a grumpy sailors might appreciate this.


Then I thought, let's be real, Grumpy cat is a total hipster. And so of course he needed a pipe, bowtie, out-dated glasses and a hat....well the hat makes him a bit more British, but I thought it was a classy touch.


And of course because it is that time of year I had to do a valentines sweater. I made cards with all of these on my etsy page and the valentines one says either "Have a Valentine's Day." or "I kinda love you."  I also made a couple Birthday cards that say, "It's your Birthday.....Good."

Yay for advertising myself! I hope you enjoyed the cat!


A Sailor and a Seascape


A friend of mine, Kelci, decided she wanted to get a couples portrait for her husband before he got home on leave.... it was supposed to be a surprise, but she got so excited she sent him the picture via phone before he got back. I take that as a compliment. 

Believe it or not, I have lived at the beach for over a year and this is my first seascape. I'm not a huge fan of them, but I felt like this came out well. Simple in both color scheme and composition. 

Such a cute couple!